
I decided that I wanted to start a little extra savings project on the side, for fun things. While reading through the net I saw an idea about picking a coin denomination and every-time you receive one of those coins to save it. I really can't remember where it came from so if it was your idea let me know so I can give you credit. I decided to pick N$ 5. the dilemma was where to store all the coins.
Hence the picture below:

My hubby likes to drink 'real' coffee. So it means there are some of these bottles around. They have wonderful sealing lids so I keep them to decant things like bags of spices/salt or popcorn. the labels peel off really easily and what doesn't peel of is gone after running it through the dishwasher. Without the label the bottle is just plain glass. A little boring for me, so I decided to make a label. I downloaded one of the pattern pieces on Sprik Space , who I mentioned here
I chose the Circles Pattern in chocolate brown

After downloading the image I opened it in Photoscape. For those of you looking for a user friendly Photo editing Software now that Picnik is closing I can highly recommend this product. you can find a link to the download of it in this post
It looks like this in the editor tab.

After selecting the image I wanted to work with from the side bar I cropped it into a rectangle to make it more of a label shape. This is done by selecting the crop tab and cropping freely

your label should look like this:

once again using the editor tab I added an object :namely a rounded box

Be sure to change the background colour of the box to match your required theme. I made mine white

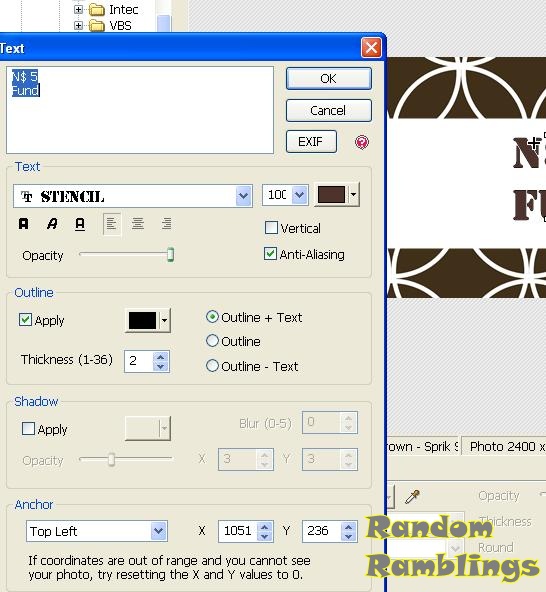
To add the text, stay in the objects Tab and Select the Capital T text tool

it will open a composition editor where you can edit the size/font/colour of your desired text. when you are done click OK and it will be added to your picture. You can move the text around to position it where you want it.
when you are happy with your design click on the photo and objects key (found in the objects tab). this will group your objects together to make one picture. Click on Save and select Save As to select where you would like to save your edited picture.

Save the picture and make sure you select a value of 95 % or higher. This will ensure the quality of the picture is not compromised.

Open your picture in your photo Viewer (I use windows picture and fax viewer) and print to your desired size.I wanted mine to wrap around the bottle so I used a full A4 size print.


Attach it to your bottle with your chosen adhesive:

overlap the ends and secure

Voila... your own personalised Label

For a little before and after:

now to start saving :)
Donations anyone?
http://howtonestforless.com/wp-content/uploads/2011/09/btn-Feature-Nest-for-Less-125p.jpg
No comments:
Post a Comment
I'd love to hear from you. Please leave a comment :)