Tuesday, 31 January 2012

1000 page views!!!


I just hit 1000 page views!!!
I know that some of the bigger blogs get that in 15 minutes but for me that's an amazing milestone :) so thanks to every-one that came to take a look :) I appreciate the support!

P.S. Life on Walnut street is having an awesome giveaway this week for some custom Designed buttons. Go check it out

Photobucket”>

Monday, 30 January 2012

Button Swop

Inspired by the Lovely Sarah over at Life on Walnut Street,

Photobucket
   
 I thought I'd try the idea of a Button swop. Basically the idea behind a button swop is that you put my button somewhere on your blog and I'll do the same for you. Since Sarah offered up this opportunity the traffic to my little blog has definitely picked up so I'd be keen to see if we can share the love a bit more. Plus its fun to 'meet' new Bloggers and gain some more followers especially for those of us who are just starting out :)

If you would be interested please drop me a comment with the url/link to your blog so I can get your button and take mine from the side-bar and add it to yours:) 


Friday, 27 January 2012

Easy Pin board Tutorial


As I mentioned in a previous Post my Mom helped me make some curtains over the December holidays(which I still need to remember to post picture of). We made some roman blinds for our spare room/office and I've been trying to incorporate the colours into the rest of the room.

the desk part of the room looks like this:

Kind of sad and pathetic. The first part of jazzing it up was to make a pin board. As ready made pin boards run in the region of N$ 70+ I decided to make my own.
this is what you will need:

- Polystyrene (Styrofoam) Board
- Scissors
- Adhesive (I used my Glue gun )
-Fabric 
- Ribbon (not pictured)
-Sewing pins( not pictured)

The first step is to lay your fabric the right side down and cut it so the is enough of an overlap for you to pull it over the back of the polystyrene board

Cut your fabric and remove the excess

Start gluing along one edge of the polystyrene and stick your fabric to the board. (its important to check that your glue won't eat away at the board. Contact adhesive will sometimes do this, the glue gun seemed to work fine)


I glued two opposite sides before starting on the corners. Make sure to pull it tight across the front of the board.
I folded it like I was wrapping a gift, making sure to glue as I went.


Sorry for the blurry picture!

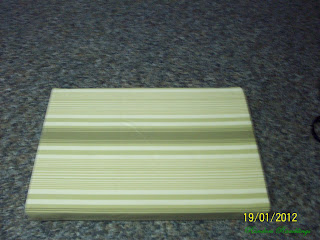
When all four corners are secure it should look like this

Back view

front view

You could stop at this stage and start pinning stuff on now if you like but I chose to go a bit further

I laid Ribbon out in a grid pattern and cut it to fit


To make sure it stayed where I wanted it I pinned it in place in a grid pattern


I turned the board over and glued the ribbon in place and removed the pins


to stop the ribbon from moving on the front I decided to use the pins where the Ribbons joined as that was what i had on hand but you could glue it down and use buttons or any other embellishment you like! 
There you have it and easy (and cheap) pin board.


Cost breakdown
polystyrene board: N$ 27.95
Ribbon (3m): N$ 5.85
Fabric: free( left over from curtains)
Glue: Free (already had)
Total: N$ 33.80

Not to shabby in my opinion :) that's a saving of at least N$ 36.20 of a small store bought one 
Now I need to attach to that to the blank wall between the shelf and the desk along with some other art work and get matching desk accessories 
Watch this space :)

Thursday, 26 January 2012

overshare??


While Chatting to my Dad he mentioned he'd had a look at my blog (well my mom showed him :) Hi Mom and Dad) and commented that I looked like I posted quite frequently. I've been trying to improve on my posting skills and have been challenged about posting stuff that was relevant

There are so many Blogs/forums/social network platforms out there full of people expressing there opinion on everything whether others wanted to know it or not. I've been sitting this morning wondering what to post and then wondering about those who actually are reading these ramblings of mine. 
I know people out there are reading (even though I only have two followers) as the Stats tell me I've had almost 1000 page views since I started. My challenge is to be relevant in what I'm sharing without crossing that fine line to over-sharing.
The question is where is the line and what would you like to see.

I'd love some feedback !! 
anyone??


Tuesday, 24 January 2012

Alphabet Photography art: gift ideas

This Christmas I wanted to do something different for gifts. We all have some people on our list that are notoriously difficult to buy for . After looking around I came across the Idea of Alphabet Photo's.


I've liked this idea for a long time and thought it would be fun to play around and see what you get. There are various options to get these pictures. You can either take them yourself (obviously but I do not have either the time nor a good enough camera to do this) you can pay for them (on sites such as this one ) or you can download them for Free :) (Leo Reynolds offers his collections of Numbers and Letters for Personal use) . Naturally being the cheapskate frugal and money-wise person I am , I used the free options :)

there are many different ways to use these letters


I've always liked the traditional way of printing the picture out individually and framing them , but both my Maiden name and current surname are quite long and standard frames with mounting's usually only go up to a length of five ( which is slightly small for my 10 letter maiden name). You could get them professionally framed but that didn't fit my budget this time around. 

I did three variations on the idea:
Option 1

For my in-laws I combined the letter's using Photoscape ( for a tutorial on how to do this check HERE), then found a quote that I liked and added the finished Jpg file and my quote into a word document. I printed it out on an A3 paper and cut it to fit one of the aforementioned small frames. I took the matting out and got it to fit. Silly me forgot to take a picture of the finished product but it came out really nicely!

Option 2

The idea for this option came from seeing this post. She uses Photoshop elements to combine the pictures and text but once again I used Photoscape to combine my letters into one jpeg file and then used word to put it all together.

When it came to printing it out I liked the double layered look like the one in the tutorial so I printed the Name and date on one page and the surname jpg on another and used one of those razor knives to cut it out. Again I forgot to take a pic so if anyone who got one of these would be willing to take one and send it to me I would be very grateful!( mom? Taz and Quintin? )

Option 3:

The third option was a variation on the above idea. We found a similar frame and made some that looked like this

Just imagine they're all in a line ( for some reason it won't let me do that)

I've also used these for my Blog button and header :) I personally think they have a lot of personality and make wonderful gifts for any occasion

Monday, 23 January 2012

Getting fancy ;)

Now I am the first to admit that I know very little about coding and all the other technical stuff that goes along with blogging but every now and then I think it would be fun to try a figure some of it out. Now I know many of you reading this don't have your own Blogs but for the four people I know that do (hi Jacky, Nabukenya, Brett and Sarah) I thought I'd share what I've learned today :)

How to make a Blog Button


A blog button is basically a picture that others can click on that automatically brings you back to the blog it belongs too. Mine looks like this close up


I found the tutorial to on how to make it HERE and even though it looks a little Greek in  the beginning stick with it and it's not hard at all!!
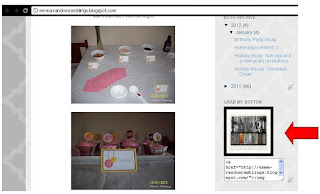
I decided I wanted to put in a "grab box" so if people wanted to use my button on their blog they would be able to see the code.
You can see all the coding in the picture above. The tutorial to make one of those is found on this SITE

These tutorials are for Blogger but the basic Coding remains the same and if you Google for WordPress/whatever platform you use I'm sure you'll find instructions.
If you do manage to create a button let me know :) 


Friday, 20 January 2012

Birthday Party recap

So I decided (at the very last minute mind you) that I wanted to do something for my birthday. I've been seeing really cute pictures on some of the blogs I read on a regular basis of printable's and decor for parties they have. Regardless of the fact that most of these are children's parties I thought it was only fair that big people (like me :)) should get to have fun party stuff like the little people !! I googled around (yes googled is a verb !) and found some awesome sites with free downloads of party stuff because I have absolutely no Photoshop/design skills whatsoever!! I found a couple of good ones and eventually decided to go with these


all these printable's can be downloaded by Clicking HERE

I thought they were cute and went with what I was going for i.e. a nice party that didn't look like I was turning 3


They were really easy to use and turned out beautifully (in my opinion) . Of course me being the idiot that I am took photo's of the table and not the people!! Regardless it was good and if anyone who has some design sense would like to teach me how on earth to do something like this I would be a very willing student!

That and someone needs to have a baby soon so I can throw you a baby shower cos I found the most AWESOME stuff for those

Friday, 13 January 2012

Home improvement :)

As I've already mentioned we had a lot of guests over the December holiday period. 5 extra people staying with us in our very small two bed roomed townhouse. Making us 7 in total if you add Willie and myself into the mix. In case you didn't realize 7 people make a lot of dirty dishes speeding up the need for one of these:


(insert sound of the angels singing a hallelujah chorus over here!!!)

When I was growing up my mom always told me that two things were non negotiable in a marriage: a queen size bed and a dishwasher. We got the bed thing sorted but when we moved into our house this was the only spot we had for our washing machine and since we already owned that it got first preference (well that and its really hard to do laundry without one but dishes are OK ). I had been given money towards a dishwasher as a gift at my bridal shower so we stored it away until we could figure out how to fit the washing machine somewhere else in our house.

Enter my Dad: aka Mcgyver and my hero:) seriously the man is a genius :) ( love you Dad). He figured out a plan to hook the washing machine up in the bathroom ( by adding and extra tap to the bathroom sink ) therefore freeing up the space for the aforementioned gift from heaven otherwise known as a dishwasher (can you pick up some of my disdain for washing dishes?)

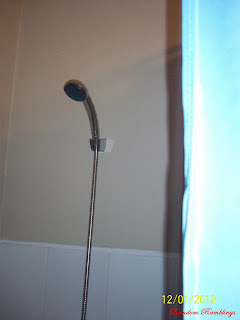
He also helped us convert the tap unit in the bathroom into a second shower to take some of the load off with 7 people and our one shower :)

can I get a whoop whoop for it being awesome!!


(View from the other side of the bathroom)

I still have some plans for this bathroom ( *cough painting cough re tile cough*) but for now it is functional and I have space for a dishwasher :)

Other things my Dad helped us with are:

Putting up a shelf in our spare room 
and helping us to put up the really awesome garden decor that my talented sister-in-law made me for my birthday :)


looks good hey :)

(I love the Herb markers!)

She also made us some other artwork for Christmas. (The awesome Calender was also a special Christmas gift :) Thanks Sarah !!)

So that's the home improvement we got done over the holiday :) my mom helped me make some curtains too and for some reason I forgot to take a picture of the so I'll add them to another post :) I still have a looooooong list of thing's I'd like to do but the house is coming on really well :)
Thanks for stopping by!!

Tuesday, 10 January 2012

Holiday recap: Sun sea and a new years resolutions

After Christmas we left a very *HOT* Windhoek for a holiday down at the coast... Henties Bay to be exact. Now Namibian beach holidays are not the same as SA beach holidays. People here go to the beach to escape from the heat and the coast is cool (as in bring a jersey).

note the grey sky and copious amount of equipment needed to block the wind

when Willie Arrived we decided to go and ride some quads in the dunes (which I would Highly recommend if you ever get the chance!!) 

It was one of the few times the mist burned off and we had the sunburn to prove it!


some of us got stuck a couple of times .... cough *sav* cough ;)

but it was amazing none the less :) I love going into the dunes cos its so isolated! It feels like you are all alone and the sand goes on for miles and miles :)

otherwise the break was filled with chilling ,food, family, food, shopping, food, sunburn, food, fishing, food (are you getting the pattern here?)
which brings me to my (our? cos Willie is joining me) New year resolution:)
we joined the Gym!!
we went for the first time last night and lets just say I'm feeling some of my muscles more than usual this morning !

Anyone else got a resolution they'd like to share?