Showing posts with label House. Show all posts

Monday, 8 July 2013

Adventures in Nursery land Part 4: painted furniture

If you can remember way back to my first Nursery Post I mentioned how we were going to paint the dresser in the baby room with Chalkboard paint... That was in April and we finished it yesterday ! Procrastinate much ?
 
Life doesn't stop unfortunately when you have a baby on the way ( although it definitely should slow down in my opinion) but every time we planned to get a start on these projects something would come up and it would get bumped down the list. I even got to the point where I was trying to convince myself it wouldn't be SO bad if it didn't happen.Thankfully two weekends ago I finally bit the bullet and jumped right in :)
 
The Bookshelf was mine as a child and has lived in many places throughout my various homes :) It looked like this before we started. Not to bad from far but up close it was chipped and kind of just blended in with the wall behind it.
 
 
The chest of drawers was one we inherited from W's Gran when she passed away. We used it in our spare room before and then decided it was the perfect height to use as a change table. Being the bad blogger I am I forgot to take pictures before taking the drawers out but I'm sure you get the idea


There was a layer of varnish that needed to be sanded off first so I used our electric sander (if you are planning on refinishing furniture invest in one! It was a such a time saver and not that expensive). The bookshelf had been painted previously so we just roughed it up with the sander to allow the new paint to stick
 
 
The Chest of Drawers hadn't be painted before so my Sister in Law painted Primer on it (it was stinky stuff so I stayed away and we made sure to do it outside )
 
 
When we started painting we quickly realised that we needed more than just one can of paint (and then I overcompensated and bought way to much! chalkboard paint anyone?).
 
 
It was quite a messy endeavour
 
 
The Final Product turned out amazingly! It's such a contrast and even though the 'grey' paint is not as grey as I thought it would be (more a blue/green/grey)  its still pretty cool:)
 
 
Apologies for the overexposed picture but I wanted to show the stencil detail on the drawers and this was the only way to do it...
 
 
Everything's back in the room and the Drawers are started to get packed.
Rooms officially ready!
EEEEKKKKK!!!
 

Wednesday, 29 May 2013

Adventures in nursery land Part 3: Crib Skirt and Pinwheels

For those who are new you can check out Part 1 and 2 of our Nursery coming together Here and Here.
 
I was off sick the last few days from work and was instructed to rest so I spent most of my time on the couch. When I started feeling better I got a jump start on some of the crafts I could do for the nursery while still on the couch.
 
When we still thought little Sprinkle was a boy we were going to do orange and aqua as our nursery theme. My mom got me a huge stack of orange material cheaply from a factory shop and it had been sitting in the cupboard waiting for me to get inspired. I decided to use some of it to make a crib skirt so I measured it out so it would fit around our crib and cut (With my pinking shears again as an easy way out as I don't have an overlocker)


I hemmed the bottom edge to give it a nice finished look.
 
 
and then used my trusty staple gun to attach it to the crib :) When I need to shorten it I can just pull the staples out with some pliers and repeat the process
 
 
Now the things stashed under the crib are hidden away :)
 
 
The whole process took about 25 minute start to finish. Now granted its not the most professional job or most complicated of patterns but I've been putting it off for months and now I could just kick myself cos it was so easy and quick.
 
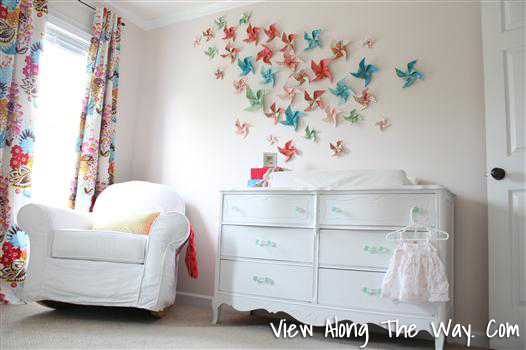
I also mentioned in my last post we were going with a loose theme of pinwheels in the space. When googling/checking pinterest for ideas i came across this nursery by View Along the Way and fell in love
 
 
Her pinwheels actually spin!! I loved the idea and set about to recreate it (somewhat) in our space.
 
I had some pre-cut square paper from a paper pad I was given that happened to be in the right colours so I started snipping away. For those unfamiliar with the process you cut from each corner towards the middle of the square. Be sure to leave a gap between the end of your cut and your centre point to allow you to have something to connect your pinwheel too. I cut small holes into the corners to allow my splitpin to go through the paper .


Fold alternate points to the centre and secure


I used split pins to hold the big ones together and little scrapbook brads (which are essentially just tiny split pins ) for the smaller ones
 
 
I didn't want to go over board so I started with a few big ones.
 
 
It looked a bit sparse so after some Whatsapp consultation's I decided to make some smaller ones too.To say I'm pleased with the outcome would be an understatement!!
I LOVE IT!!!
 
 
It adds so much fun to that side of the room :) Lets hope Sprinkle enjoy's them too :)
 
My Joy-Filled Life

Wednesday, 24 April 2013

Adventures in Nursery Land Part 1

I sure every new parent can agree that (if you have the space) it is so exciting to decorate and get ready for your impending bundle of joy. As a notorious over planner I started planning what I wanted before I was even pregnant and decided on Orange and Aqua/Blue as a colour scheme. This was all good and well when we thought we were not going to find out the Gender but when we found out Little Sprinkle was going to be a girl I wanted to 'girlify' the theme without making it too babyish as her room will still have to function as a guest room when we have visitors .
 
The Problem comes in when we were told that Sprinkle was a boy at our 16 w appointment... Doc said he was 98% sure of it but we should confirm at the Anatomy scan. Now when your doc says 98% you think its kind of a sure thing and I started buying a few things with my original colour scheme in mind. Imagine our surprise at the change a few weeks later when my little Boy was actually a little girl (a fact we had double checked. We have the 4D scan of girl bits to prove it ) .
 
Anyway I ramble on, In the Beginning we thought we would just go with a camp cot (or pack and Play for my American readers) as wooden Baby furniture was SO expensive... We are limited for options here in Namibia (there are only two specialist baby shops in the whole of Windhoek) and even a basic cot was over R2 000. Imagine our surprise when we went into a non baby store one day and found a Beautiful Wooden Cot for less than half that! Needless to say we bought it (at only 10 weeks pregnant) and stored it with the rest of our junk till we were ready to move. It was the first piece of furniture to go in the new house :)
 
Here it is still in it's box
 
 
W. Unpacking the flat pack and trying to find the instructions :)
 
 
My Dad Comes and Fixes things when he comes to Visit us and always ends up buying us some sort of tool cos our collection is rather Meagre. This time he got a little electric screw-driver (indicated by the arrow below). IT.IS.AWESOME!!! We fought over both enjoyed using it very much to put the cot together ;)
 
 
final finishing touches
 
 
there it is :)
 
 
it has been moved around as more furniture has been added to the room but so far I still am really happy with this choice. Its Small and has nice Simple lines that fit in with the rest of the pieces we have very well! Speaking of other Pieces I managed to Convince my wood-purist Hubby to let me paint the Dresser we have for the room. He's gotten so on board he even suggested we use Chalkboard paint . We got some of the Brand below (its an SA Brand... you can find more info on their Facebook page ).


Will def Give more info when we tackle that project :)


Thursday, 18 April 2013

Long overdue move in update

It feels like the blog has become nothing but Baby and Puppies lately ... In truth there has been so much going on its hard to process it all and the previous topics follow a fairly predictable pattern so I know what I need to say and when it needs to be said. Regardless many people have asked about our new home and how we are in enjoying it. It is still very much 'in progress' but certain area's are ready to be shown off.
 
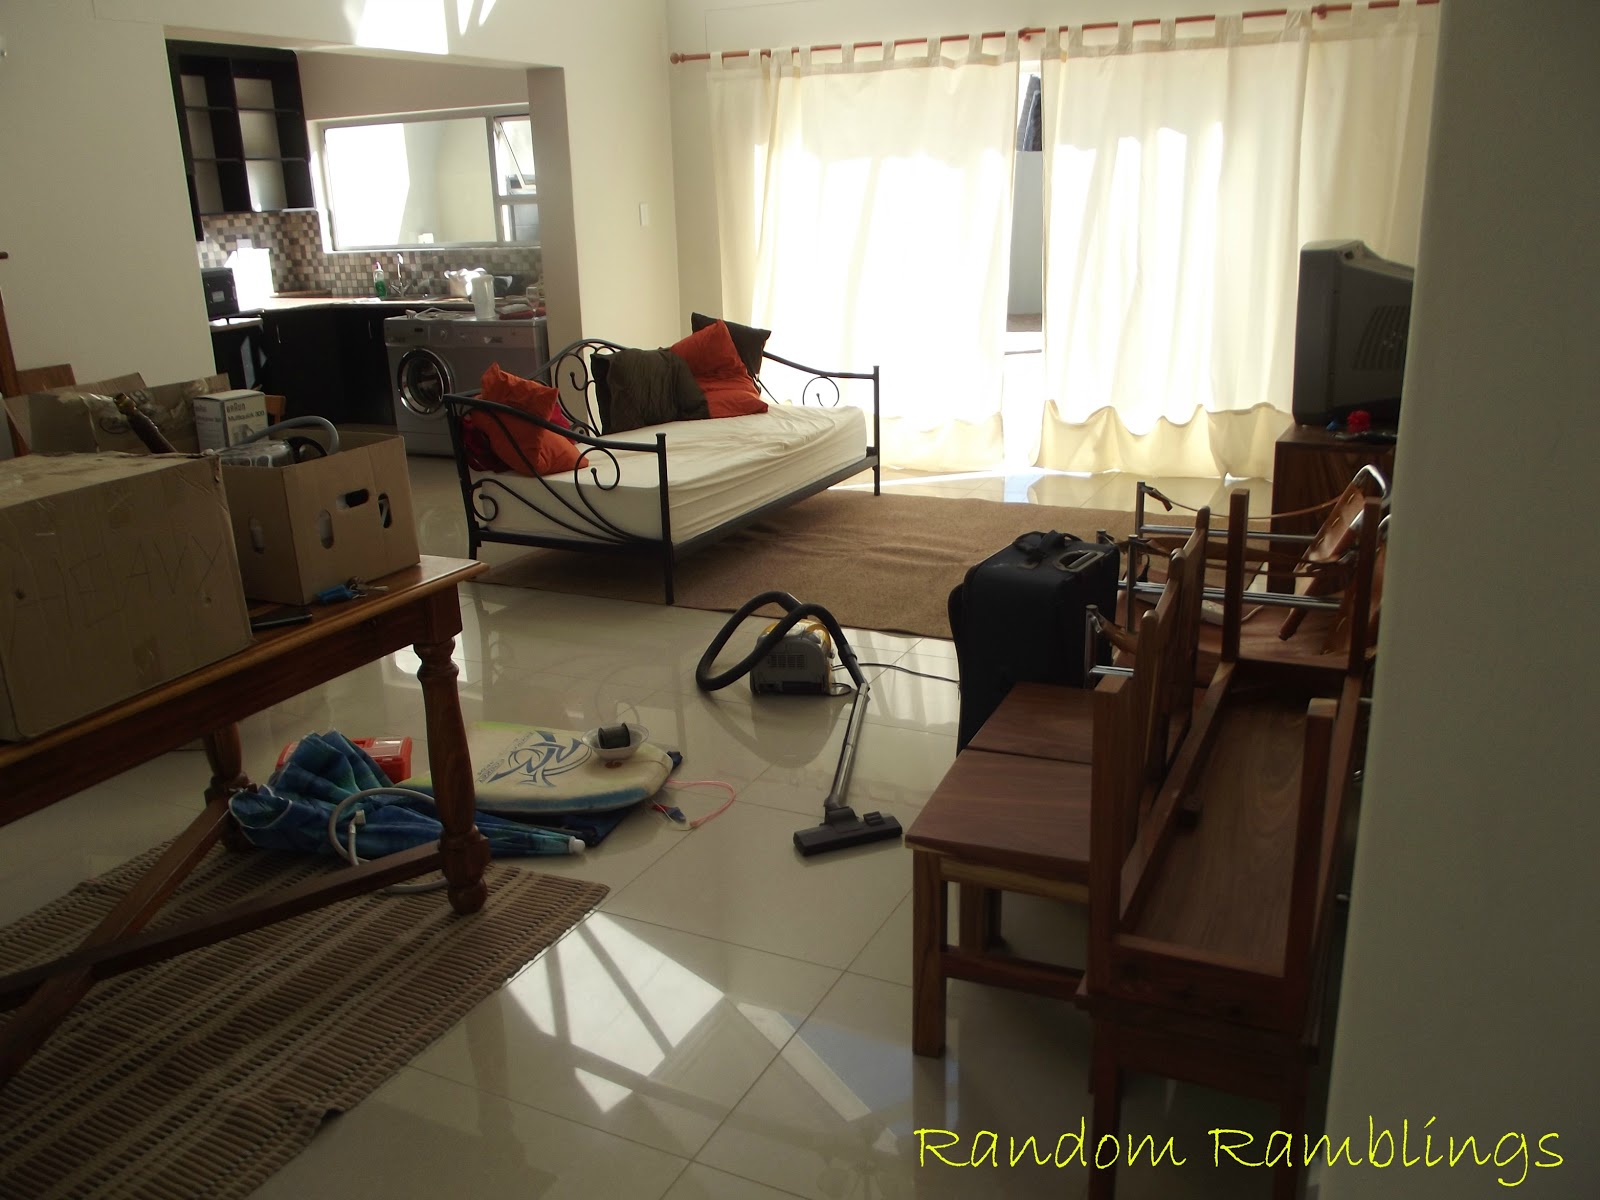
Here it is on 'Moving day


We have now settled on a layout that works although our furniture looked minute in the big space. I also think we need a bigger rug under the table to ground the area more but we were working with what we had. This is a shot from the lounge side looking towards the front door. Passage to rooms/bathrooms is on the left.
 
 
View from the passage of the lounge/dining room/kitchen
 (for some reason the pillow on the couch looks pink... its actually red)
 
View from the front door towards the back. Please excuse the crazy puppies photo bombing (see if you can spot them ).
I still think this side of the room needs some art or something but like I said work in progress
 
 
this is the passage with my Family Mirror I made. This is one of my favourite spots in the house :)
 
 
hopefully things will settle more into a routine now and I'll be able to think of some more varied topics to blog about , but if not I hope you like baby's and puppy's cos  I have a lot of information on those to share too.


Wednesday, 20 March 2013

Introducing...

Meet Lucy...
 
 
She is the first of two four legged family members that will be joining our growing family.
She arrived yesterday, very suddenly as we weren't expecting her till the weekend, and made herself right at home ,
 
 
We made it through this first night with two pees on the kitchen floor,half a poop on the carpet (which thankfully I caught in time) and one and a half successful outdoor excursions.
 

Tuesday, 12 March 2013

Its the Final Countdown....

Now that everyone (including myself )will have that song stuck in their heads for the rest of the day, time for (hopefully) one of the last building updates I'll need to write!! We are two plugs, one garage door and a geyser valve away from calling this house move in ready!
Can I get a hallelujah!!!
Seriously though, I always thought building was easy and fun. You get to choose all the things for yourself and there might be some minor setbacks but on a whole things would move pretty smoothly.. I laugh at my naive view now on the other side! I have gotten to the point where I never want to make another decision about building related issues! It was fun to choose everything but half the time by the time our builder got to get the stuff it was out of stock so we had to make a rush decision on a replacement..
 
Anyway the kitchen is all but done so I thought I'd show the final shot before we fill it up and have to try and find space for all our stuff (eek!!!)
 
 
Please excuse the random extension cord... its plugged into the small geyser we have under the sink which is one of the plugs we're still waiting on. Its fun to see all your plans work out like the pictures in your head :) Also please note the amazing kitchen island MADE by my Dad...
 
also just as a bonus here's a shot of our roof... this is my favourite part of the whole house design (although admittedly it does make decorating a challenge). You'll also notice we frosted the front door for some more privacy from the street. I'll give details on that soon :)


If all goes according to schedule ( and we all know how that's worked out for us in the last few weeks) the security system will be installed today and the garage door will FINALLY arrive tomorrow .
guess we'll wait and see :)


Thursday, 7 March 2013

pictoral progress


3 cupboard doors, 1 extractor fan, 1 Garage door,1 shower screen and 2 airconditioners and this house is DONE!!

Tuesday, 26 February 2013

Quick house update

This house is going to be the death of me!! I think whats so frustrating is that we are SO close to being done and yet it just doesn't seem to be reaching a final point.


Thursday, 14 February 2013

Deadline Schmedline

So the deadline for completing the house is tomorrow... or should I say was supposed to be tomorrow... We're still a long way from move in ready, considering all of our bathroom fittings look like this
 
 
Not really in the right place hey :)
 
Nevertheless the progress has been dramatic. The tiling is 97% completed (and will hopefully be done by the end of business today. Second coats of paint are going on. Bedroom cupboards are in and kitchen ones will arrive tomorrow. The back patio has been cast and assuming the last load of bricks arrive today the Braai will be built in too. Interior doors are also going in. Plugs and fittings are also meant to be going in today and we will hopefully have electricity by tomorrow at the latest!


Still no sign of exterior doors and windows hence the no moving in ! If we lived in a safer world I'd be tempted to move anyway but the risk of some-one 'privitising' our belonging is too great. Keep praying this all comes together soon!! if not by our deadline (which I doubt) by sometime next week!!